How to create a table in Nyingarn workspace
*Pro tip! It is easiest to create a blank table and fill it in rather than write all the words and then create a table around them.
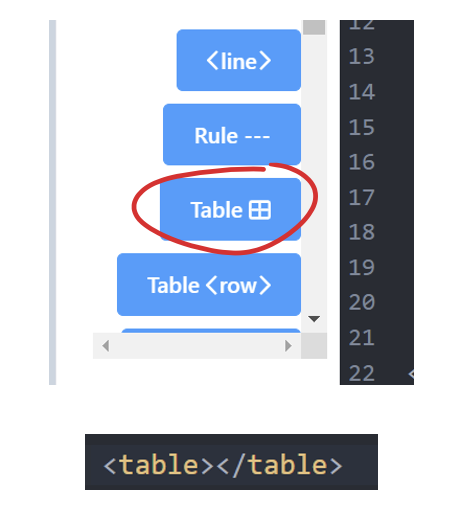
1. Select the TABLE markup button in the centre column of the workspace. The TABLE button will create a code on the black transcription box that looks like this <table> </table>.
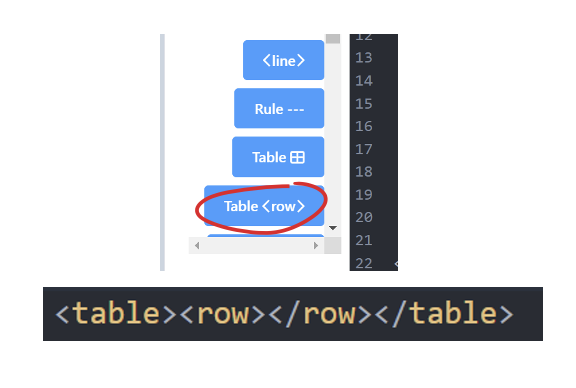
2. Once you have this, place your cursor between the two arrow brackets facing each other. For example, <table> HERE </table> and (3.) press on the blue markup TABLE <ROW> button.
4. Once you have this code, place your cursor between the triangle arrows between the ‘row’ codes e.g. <table><row>HERE</row></table>. At this spot, (5.) press the blue markup TABLE <CELL> button.
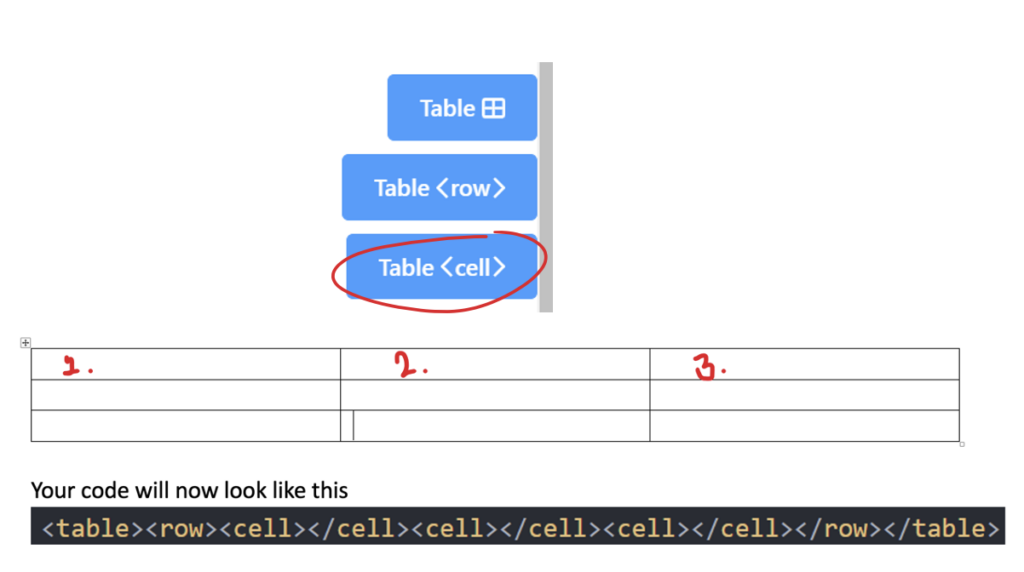
Please note that this button will need to be pressed multiple times depending on how many cells wide a table is. For example, this table is 3 cells wide – therefore, you must press the blue markup TABLE <CELL> button 3 times.
*notice that from left to right the code reads ‘table’ then ‘row’ then ‘cell’…. And at the end, it reads ‘cell’ then ‘row’ then ‘table’*

7. Next copy and paste this code as many times as you need. The number of times needed depends on the height of your table in cells. For example, in the table below, it is 3 cells high.
To make this easier, after highlighting the code between the ‘row’ code. Hold your computer key ‘ctrl’ (usually in the bottom left of your keyboard) and then press the ‘c’ key. This will copy what you have selected.
In order to paste what you have selected, select ‘ctrl’ again, and then tap the ‘v’ key on your keyboard to paste what has been copied. The number of times you need to press this depends on the height of your table. In the example, this will be 3 times.

*Note: you must paste the code within the two ‘table’ codes that you have already created <table> & </table>. This is because the ‘table’ codes must encompass what you have created in order for the computer to create a table.
Now I know what you are thinking… “what is this?!”
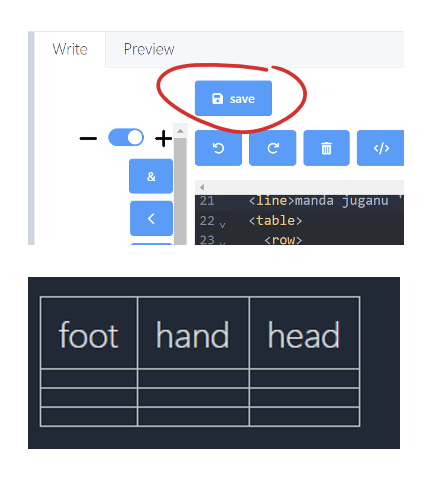
8. But all is well. All you need to do now is press the ‘save’ button at the top of the screen and it will be a lot easier to understand. It will look like this below.
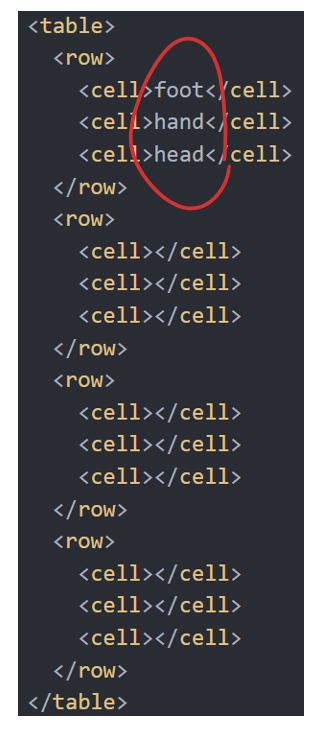
After saving, you will see the first and last words are ‘table’, and each of the ‘cells’ has a ‘row’ above and below each block of ‘cells’.
9. Now that you have it all neatened up. You can start adding words in. To do this, you just need to select between the ‘cell’ codes on each row. For example <cell>
To check your progress, select the blue SAVE button and then white PREVIEW button at the top of the black transcription box.
It should look like this.
Congratulations, you have created your first row.
Now continue to add words into the cells to finish your table.