The Nyingarn Workspace can ingest your DigiVol transcription work. Follow the instructions below.
Accessing Digivol data
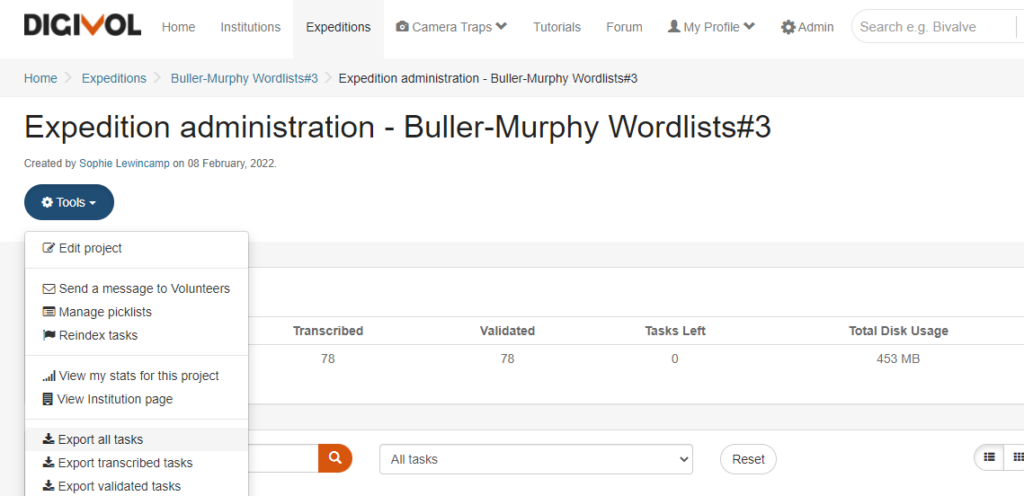
Once your transcription and validation work is complete, navigate to the Expedition Administration screen. Click the Tools button (orange left hand side) to view the export options
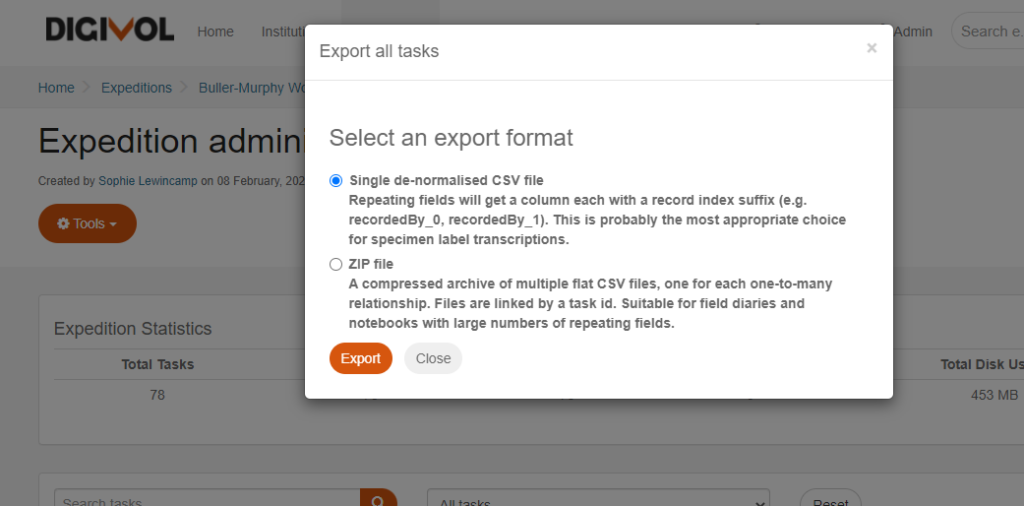
Select Export all tasks. Then choose single de-normalised CSV file
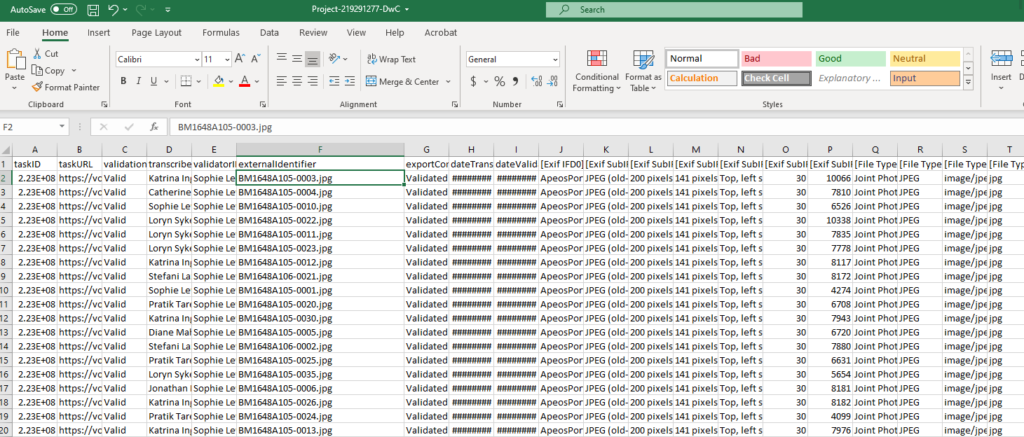
The download CSV file will look like this. The file will need to be rename for import into the Nyingarn Workspace. For this example, the file should be renamed BM1648A105-digivol.csv. You can also see the manuscript image file names are consistent with this naming conventions; BM1648A105-0003.jpg, BM1648A105-0004.jpg, etc.
Uploading DIGIVOL DATA
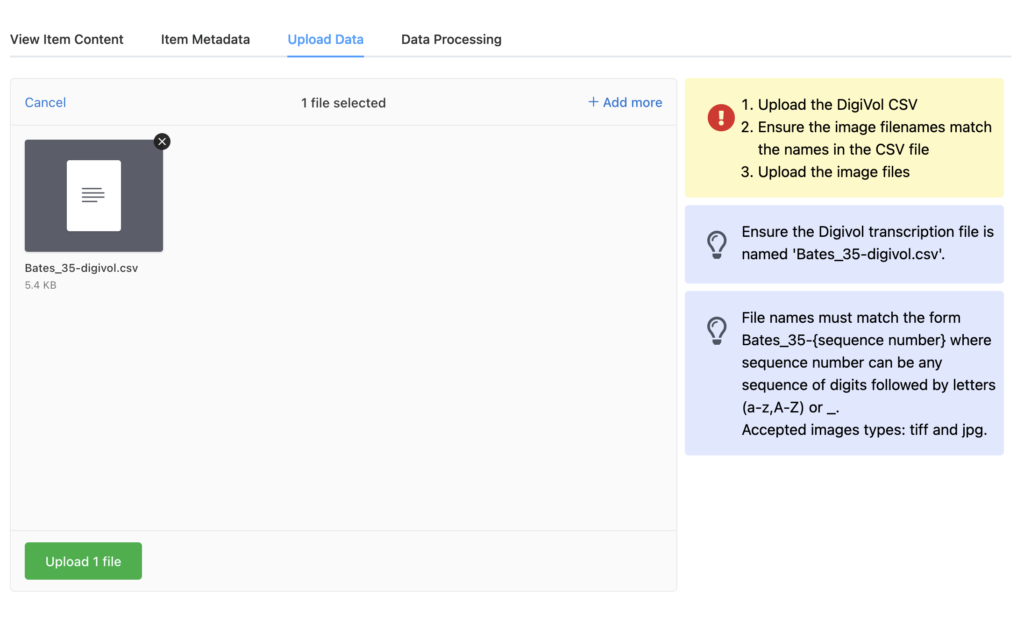
To upload data from DIGIVOL into the workspace you must first upload the DIGIVOL CSV file. Name the file "{name of your item}-digivol.csv” and then upload it to the workspace. At this stage do not upload any images. When the workspace receives the DIGIVOL CSV file it extracts the transcriptions for each image and creates a file for each. If you upload the images before this stage has been completed your images will be sent through Optical Character Recognition which is not required.
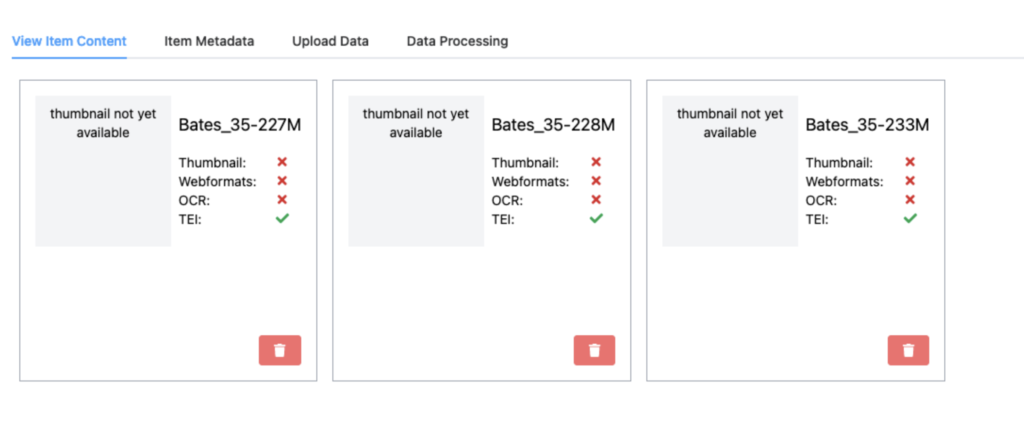
Once the CSV file has been processed you should see placeholders for each resource defined in the file on the “View Item Content” tab.
At this point, you can upload all of the defined image files. As these are ingested into the workspace they will go through processing stages to produce thumbnails and various formats suitable for display on the web. Once complete, the Item Content tab will look like this.
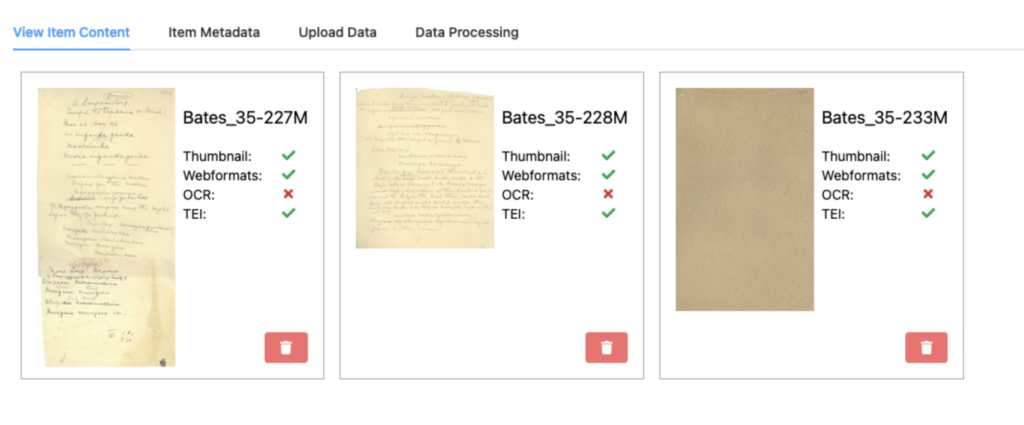
Notice the green tick for “Thumbnail”, “Webformats” and “TEI” for each image. Each of these resources is now ready for further work inside the workspace. Also notice that OCR is not ticked. As stated earlier, when ingesting the transcriptions from DIGIVOL the OCR step is skipped.